The implant positions and angulations are captured with PIC system's guaranteed precision.
2. Soft tissue capture
The geometry of the soft tissues is captured with an intraoral scanner or a conventional impression.
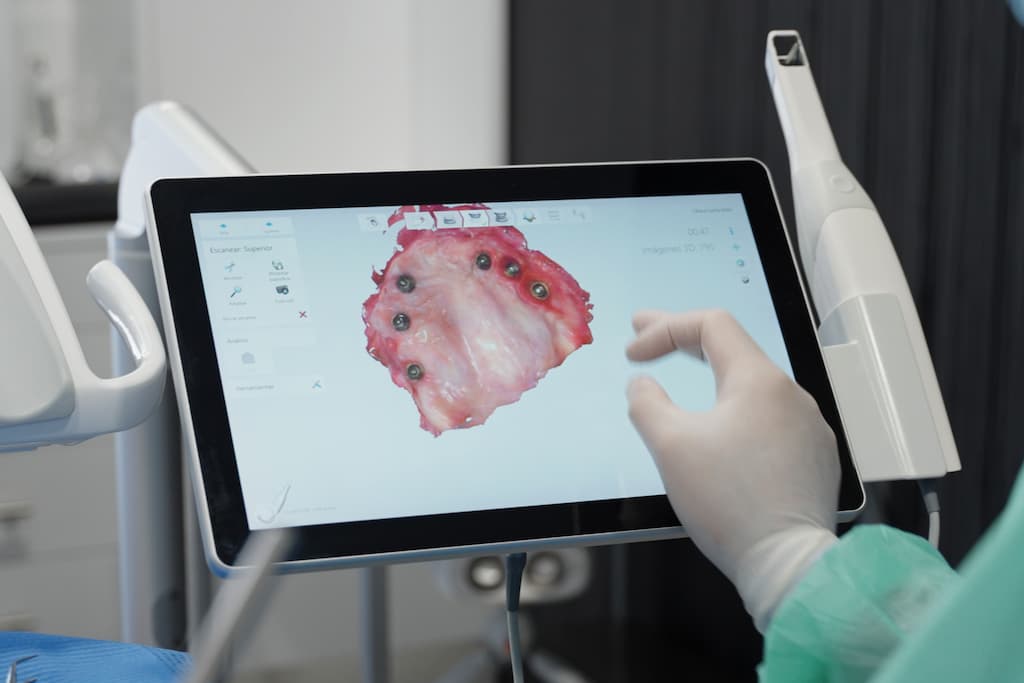
3. Precise digital model
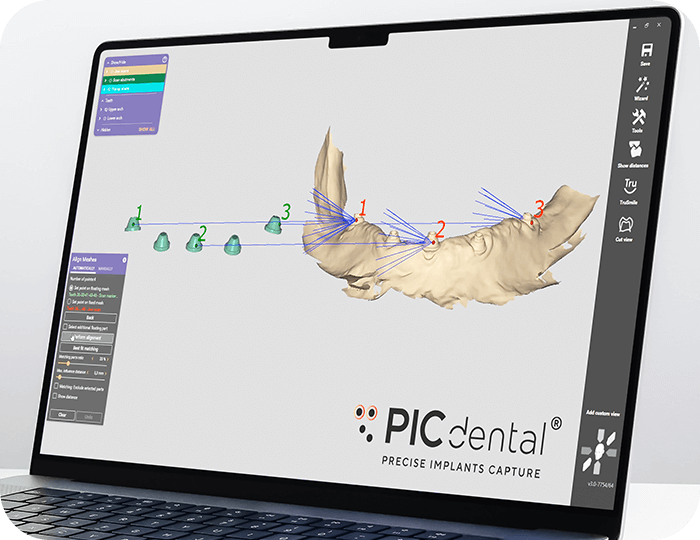
The PIC file containing the implant positions and the soft tissue data are aligned in a dental CAD software.
Precise Implants Capture means you get a guaranteed passive fit
Precise Implants Capture means you get a guaranteed passive fit
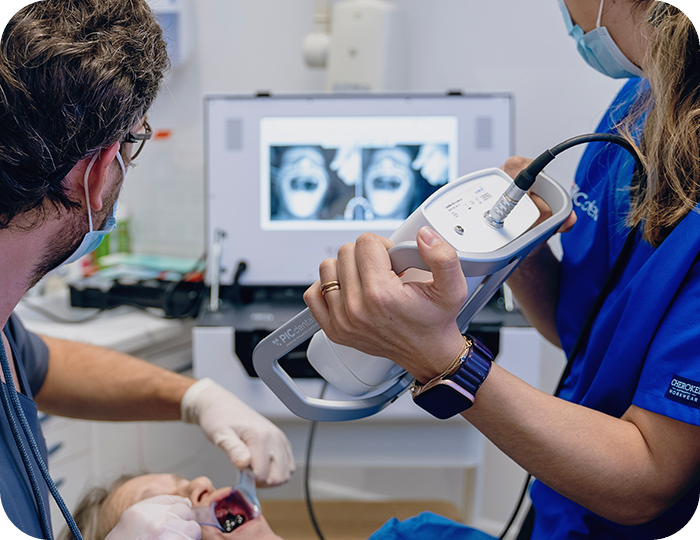
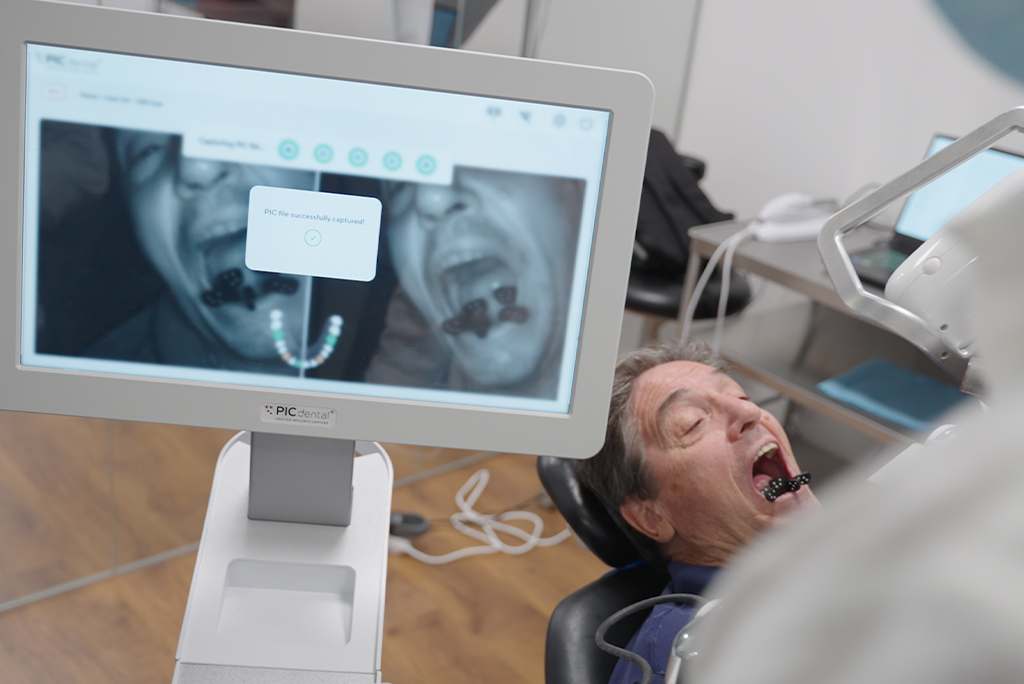
1. Implant positions capture
In this step the interrelated implant positions and angulations are captured with the PIC system's precision.
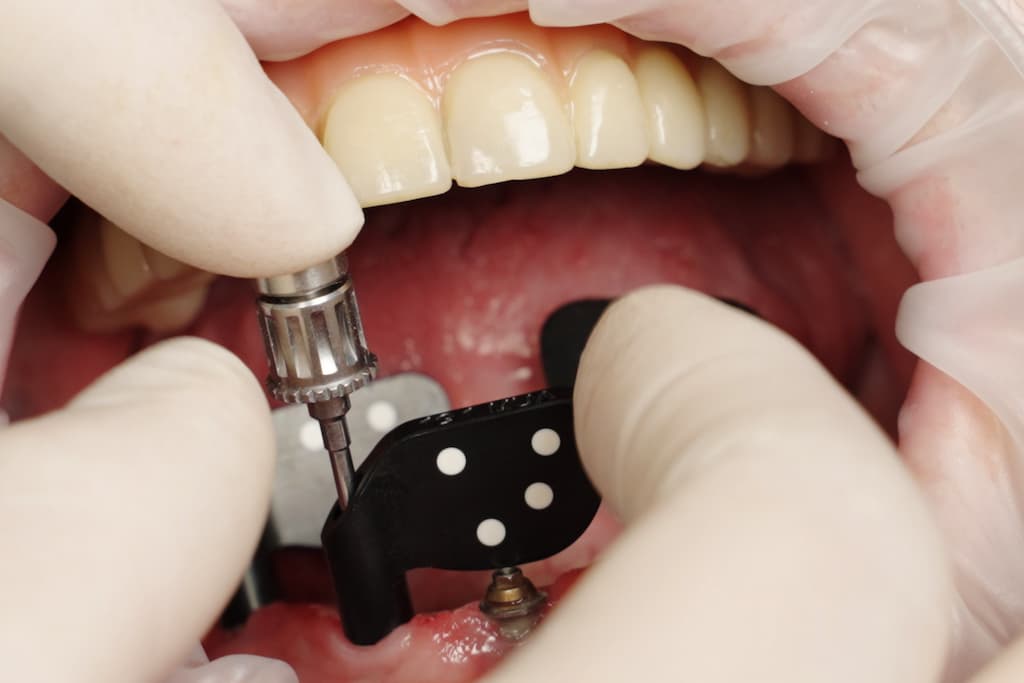
The PIC transfers are screwed on the patient's implants. Their distribution is set up in the PIC suite software odontogram.
The PIC camera captures images of the PIC transfers that are measured by the PIC suite software. The full capture takes under 30 seconds in most full arch cases.
The result of the impression is the PIC file, exported as an STL file with the geometry of the scan markers that will be used for aligning the soft tissue.
Did you know?
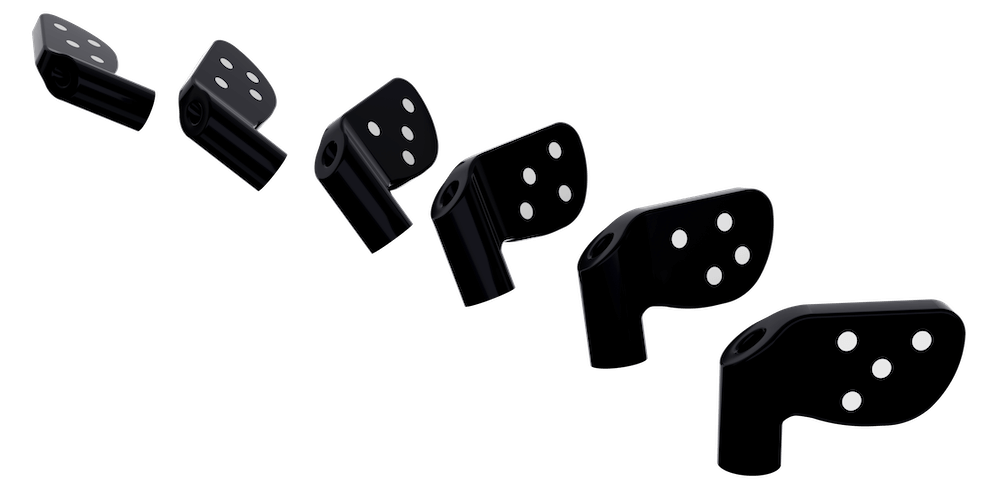
PIC transfers are available for thousands of different implant platforms from any manufacturer with models for bone level, tissue level (direct-to-implant platform) or abutment level (transepithelial abutments).
And you can even combine several PIC transfers of different platforms in the same clinical case.
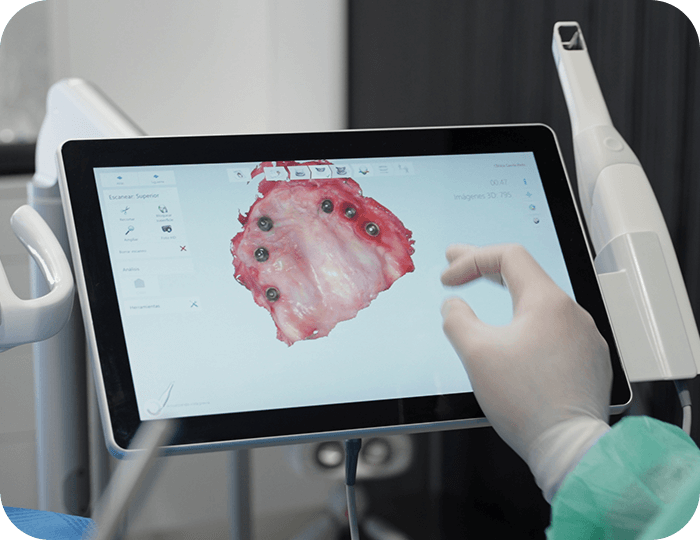
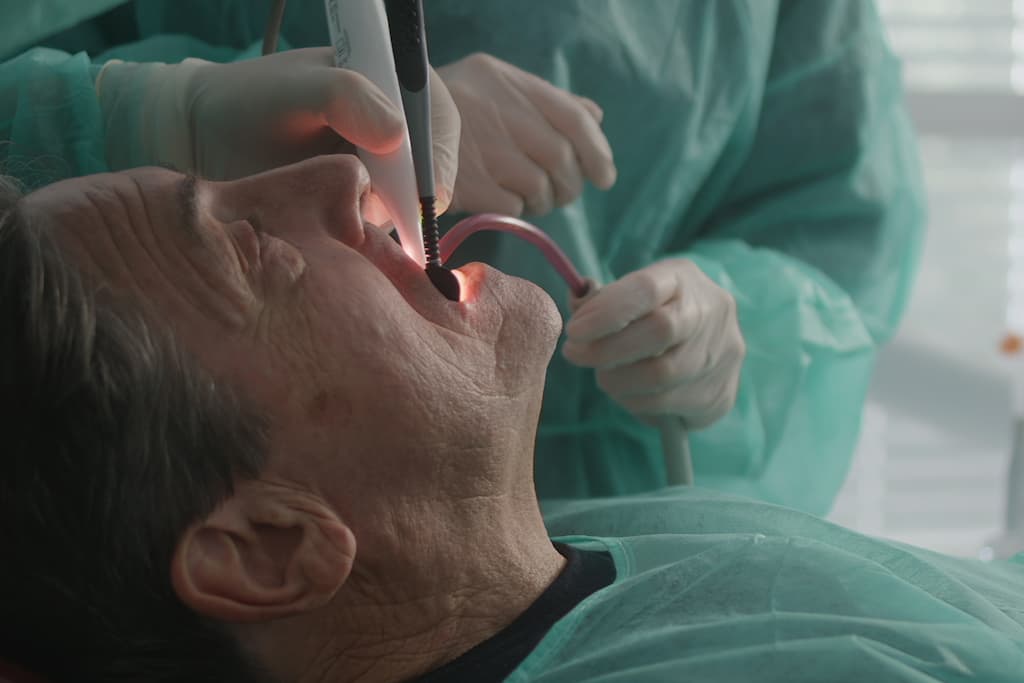
2. Soft tissue capture
In this step the soft tissue data is captured.
ThePIC file contains only the interrelated positions and angulations of the implants. It does not contain soft tissue data.
The soft tissue data is needed to complete the patient's digital model and it's captured during this separate step.
The soft tissue capture may be done with any intraoral scanner. Alternatively, soft tissue data can be acquired with impression material such as alginate or silicone and then digitized.
Did you know?
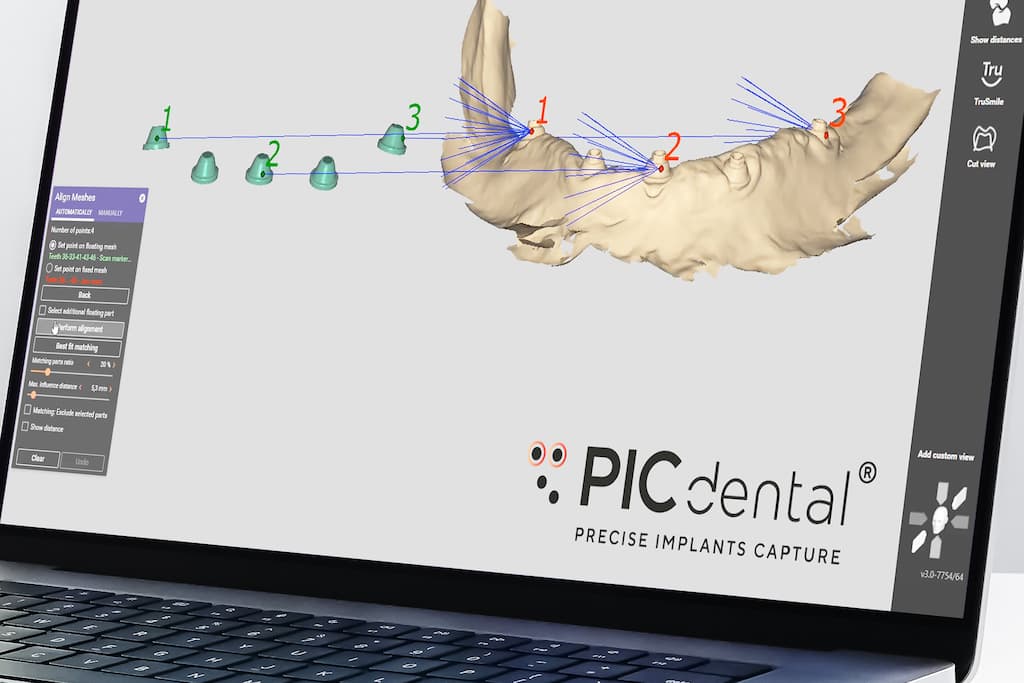
In order to align the PIC file with the soft tissue scan data, common geometrical landmarks are necessary. The pieces that provide these matching reference points are commonly known as scan markers.
PIC dental offers great flexibility as the alignment may be done with any of the following scan markers used during the soft tissue impression: transepithelial abutments, healing caps, scan bodies and implant platforms.
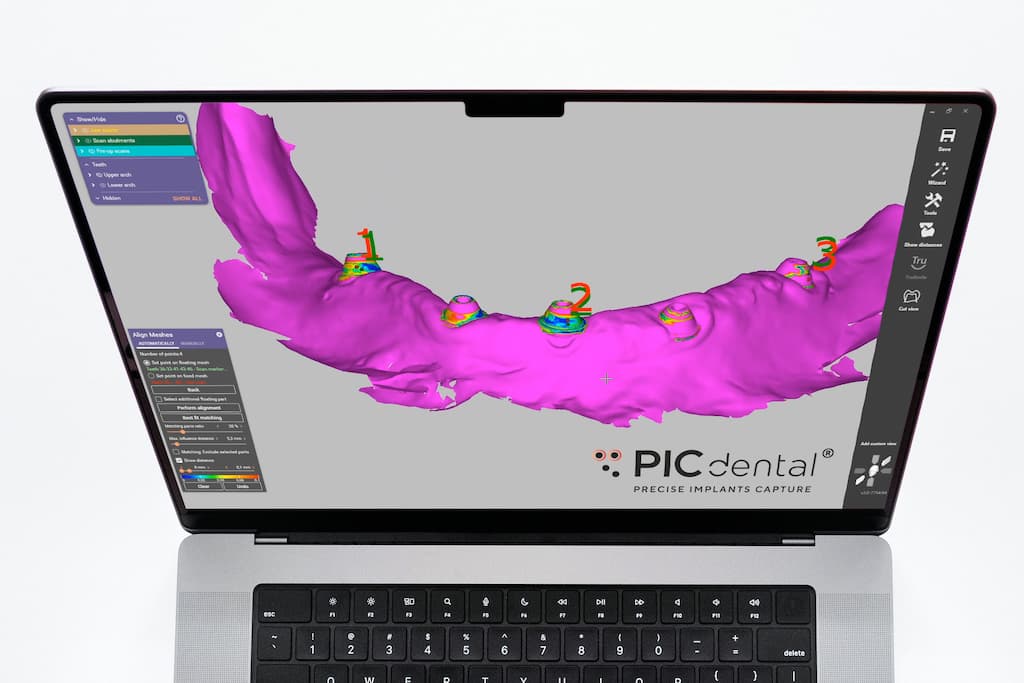
In this last step the PIC file containing the implant positions is aligned with the soft tissue information to complete the digital model.
The alignment can be done in any dental CAD/CAM software, such as exocad® or 3Shape®.
The alignment matches the soft tissue geometry with the PIC file in order to have a complete digital model where the implant positions have the guaranteed passive fit of the PIC system.
Experience the full digital workflow of PIC system in action with a real patient case.
Complete digital workflow for a restoration using PIC system
Scale Up
Your Full Arch Practice
More cases in less time.
Forget the usual bottlenecks of a high volume of full arch implant-prostheses rehabilitations.
Improve the quality of your restorations while reducing costs, work, delivery time and patient appointments.